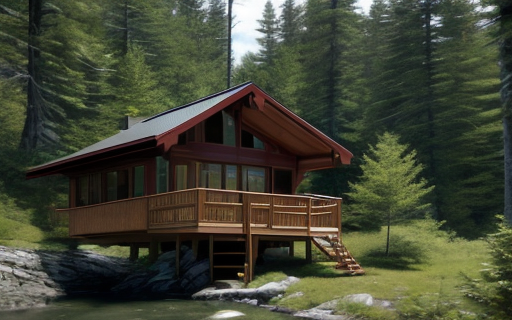
Best Meshtastic Antennas for Adirondack Terrain

Choosing the right antenna matters more in the Adirondacks than it does in flatter, more forgiving terrain. Dense tree cover, rolling ridgelines, wet foliage, and seasonal changes all affect a Meshtastic link budget. A setup that feels acceptable on a bench test can fall apart once it is moved into mixed forest or behind terrain.

This guide focuses on practical antenna choices for Adirondack conditions, not generic marketing claims. The goal is to help new and experienced node builders choose something appropriate for trail, home, camp, ridge, or relay use.

What makes Adirondack terrain different

  • Tree cover absorbs and scatters signal, especially in leaf-on months.
  • Terrain shadowing can dominate range more than raw antenna gain.
  • Weather and moisture change performance enough to matter in real use.
  • Portable setups often need durability and consistency more than theoretical peak gain.

Start with the deployment role

The best antenna depends on what the node is supposed to do.

Portable trail node

  • Prefer compact, durable antennas with reasonable efficiency.
  • Flexibility and survivability matter more than chasing maximum gain.
  • Keep feedline short and mounting simple.

Camp or cabin node

  • A modest outdoor antenna mounted clear of nearby obstructions usually beats an expensive antenna mounted poorly indoors.
  • Height and placement usually deliver more improvement than moving from one average antenna to another.

Fixed relay or coverage node

  • Use higher quality outdoor hardware, weatherproofing, and good coax discipline.
  • Before increasing gain, make sure the site itself actually has line-of-sight advantages.

What to prioritize

  1. Placement over hype: a decent antenna in a better location wins most of the time.
  2. Good connectors: poor connector quality and sloppy adapters quietly waste performance.
  3. Short feedline: long coax runs can erase the advantage of a better antenna.
  4. Mechanical durability: Adirondack weather and transport are hard on fragile antennas.

Community-backed 915 MHz antenna picks

If you want the short version, the same names keep surfacing in the Meshtastic community and in Reddit discussions: GIZONT for handheld use, Linx or Smiley for compact quality options, Alfa and Rokland for fixed installations, and Laird or Taoglas for vehicle setups. That aligns closely with the current Meshtastic community favorites list.

Use case Best-rated community picks Why people keep recommending them
Handheld / trail node GIZONT 17cm whip, LINX ANT-916-CW-HW-SMA, Smiley 906 Slimline These are the most consistently mentioned compact options because they are practical, tuned for the right band, and noticeably better than many stock antennas without becoming awkward on a pack or handheld build.
Cabin / home / small fixed node Alfa AOA-915-5ACM These are the common step-up choices when you can mount outdoors and keep coax loss under control. They get recommended because they come from known vendors and are used in real Meshtastic installs, not just listed with inflated marketplace claims.
Vehicle node Laird MA9-5N, Taoglas TI.16.5F11 These show up for mobile installs because they are purpose-built mobile antennas from established manufacturers rather than random generic whips.

Best pick for most Adirondack handheld builds

GIZONT 17cm 915 MHz whip is probably the safest community recommendation if you just want one answer. It shows up repeatedly in Reddit threads because it is compact enough for a pocket, shoulder strap, or trail node, yet still gives meaningfully better performance than many stock antennas. Several community members also point out that it tends to arrive reasonably well tuned compared with generic marketplace antennas.

If you want a more established component-vendor option, the LINX ANT-916-CW-HW-SMA is the cleaner buy. If you want a more compact premium-style portable option, the Smiley 906 Slimline is well liked for handheld carry.

Best fixed-node value for cabins and home stations

Alfa AOA-915-5ACM is the strongest concrete recommendation here for builders who want a real outdoor base antenna with a current product match. For Adirondack cabins, camps, and ridge-adjacent installs, this is usually where you should spend money before chasing extreme-gain marketing claims.

In practice, an outdoor Alfa antenna mounted higher with short, decent coax will usually beat a more expensive antenna sitting inside next to a window. In forested terrain, placement and height still matter more than the number printed in the product title.

If you want the specific Alfa option referenced here, the Alfa AOA-915-5ACM at Rokland is the exact product match.

Vehicle recommendation

For a truck, trail rig, or support vehicle, the community tends to trust Laird MA9-5N and Taoglas TI.16.5F11. They are recommended less because they sound exciting and more because they are known mobile products that hold up better than random SMA whips sold as “915 MHz high gain.”

What Reddit and the Meshtastic community keep warning about

  • Do not trust fake dBi numbers. Community discussions repeatedly warn that many Amazon and marketplace antennas advertise impossible gain figures for their size.
  • Stock antennas are often weak. One of the most common Reddit takeaways is that almost anything verified and properly tuned beats the average bundled antenna.
  • Tune and verify when possible. The more serious builders use a NanoVNA because too many antennas are sold for the right frequency on paper but are badly tuned in practice.
  • Bigger is not automatically better. Higher-gain omnis can flatten the pattern, which can hurt you if the node you need is uphill, downhill, or buried in mixed terrain.

Recommended approach by builder level

Beginner

Buy one good handheld antenna from a trusted source, preferably a GIZONT 17cm, LINX 916, or similar verified 915 MHz whip. Learn placement, power, and channel configuration before spending money on larger antennas.

Intermediate

Move toward a modest outdoor cabin or roof antenna such as the Alfa AOA-915-5ACM. At this stage, mount quality and feedline loss matter more than buying whatever claims the highest gain. If you would rather get the node and that antenna as a matched pair, the Atlavox Beacon ships with exactly this antenna on an N-type feed. For pre-matched omni-on-RP-SMA at a lower price, the WisMesh Repeater Mini ships with a Blade antenna suited to coverage-gap relays.

Advanced

For relay-style use, evaluate the site first, then optimize height, weatherproofing, and feedline quality before making gain your only decision criterion. In the Adirondacks, a better ridge, tree break, or mounting point can outperform a spec-sheet upgrade.

Common mistakes

  • Buying “high gain” with no regard for terrain shadowing.
  • Using excessive adapters and long thin coax.
  • Testing indoors and assuming the same performance outdoors.
  • Mounting next to metal, roofs, or dense building materials.
  • Buying random marketplace antennas with no verification from the Meshtastic community.

Practical field checklist

  • Test the node at multiple heights before final mounting.
  • Compare leaf-on and leaf-off performance if the site is permanent.
  • Document terrain direction, weak sectors, and seasonal behavior.
  • Use weatherproof connectors for anything left outdoors.
  • When possible, verify a new antenna with a NanoVNA before trusting it on a permanent install.

Disclosure: Some gear links on ADKMesh may be affiliate links. If you buy through them, ADKMesh may earn a commission at no extra cost to you.

If you want one practical US source for the antenna types discussed here, Rokland is the priority vendor we recommend checking first, especially for common Meshtastic-compatible antennas and accessories.

If you are building your first Adirondack node, start with our Meshtastic Beginner Setup (US 915 MHz), then review the Adirondack Node Deployment Guide, the battery and solar sizing guide, and the Meshtastic Vendors page before buying hardware.

For official reference material, see the Meshtastic documentation and the Meshtastic antenna community favorites page.
Best Meshtastic Solar Node Builds in 2026

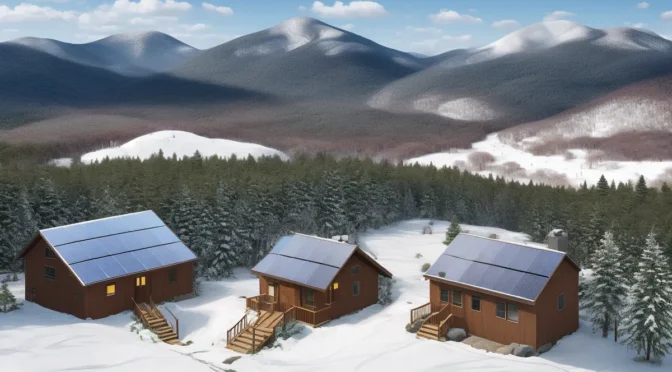
If you’re building a Meshtastic node meant to run outdoors year-round without shore power, your hardware choices matter enormously. This guide covers the best Meshtastic solar node builds for 2026 — ranked by power efficiency, cold-weather resilience, and real-world reliability in challenging terrain like the Adirondacks.

Unlike affiliate-style roundups, these picks are grounded in actual field behavior. A node that looks great on a summer bench test can fail in November if you haven’t sized the solar panel for shoulder-season insolation or chosen a battery chemistry that handles sub-zero temperatures.

What Makes a Great Meshtastic Solar Node?

Three factors drive solar node success:

  • Average current draw — not peak TX current, but the milliamps consumed 24 hours a day across sleep, idle, and transmit cycles
  • Battery chemistry and capacity — LiFePO4 wins for cold climates; standard Li-Ion loses 25–40% capacity below -10°C and cannot be safely charged below freezing
  • Panel sizing for worst-month insolation — size for December sun hours, not July. A panel that works great in summer can leave your node dark all winter

The Adirondacks see roughly 2.0–2.5 peak sun hours (PSH) per day in December and January. A node drawing 5 mA average needs ~120 mAh/day from the panel — achievable with a 1W panel in summer, but you need a 3–5W panel to handle winter cloudy stretches with margin to spare.

Best Hardware for Meshtastic Solar Nodes in 2026

1. RAK WisBlock RAK4631 — Best for Unattended Long-Term Deployment

The RAK4631 paired with a RAK19003 Mini Base Board remains the gold standard for low-power unattended solar nodes in 2026. Built on the Nordic nRF52840, the module achieves ~100 µA sleep current with the LoRa radio in standby — a fraction of what ESP32-based boards consume at rest.

Key specs:

  • Sleep current: ~100 µA (measured)
  • TX peak current: ~130 mA at full output
  • Average draw at 15-min TX interval: ~2–4 mA typical
  • Operating temperature: -40°C to +85°C (nRF52840 rated)
  • LoRa chip: SX1262
  • Approximate cost: $35–50 (module + base board)

Best solar pairing: A 3.7V LiFePO4 cell (3000–6000 mAh), a 2W–4W panel, and the CN3791 MPPT charger module. This combination can realistically deliver 18–24 months of unattended operation with only annual maintenance visits.

Adirondack note: The nRF52840 remains reliable well below -20°C. Do not use standard Li-Ion cells in outdoor unheated enclosures in northern New York — LiFePO4 is mandatory for any year-round build.

2. LILYGO T-Beam Supreme — Best for GPS Position-Reporting Nodes

If your node serves a dual role as a position-reporting tracker or a relay with precise location metadata, the LILYGO T-Beam Supreme is the standout 2026 option. It ships with an AXP2101 power management IC — a meaningful improvement over the earlier AXP192 found in older T-Beam variants, offering lower quiescent current and better battery charge management including solar input support.

Key specs:

  • MCU: ESP32-S3 dual-core
  • LoRa: SX1262
  • GPS: u-blox M10 (low-power GNSS)
  • Sleep current: ~1.5–2 mA with GPS off
  • Battery: 18650 cell holder (included)
  • Approximate cost: $40–50

Best solar pairing: A quality 18650 LiFePO4 cell (EVE or Lishen brand), a 6W–10W panel to cover the higher baseline draw, and an IP65-rated ABS junction box. Disable GPS when accurate position is not needed — the u-blox M10 adds ~25 mA while actively acquiring satellites.

3. Heltec WiFi LoRa 32 v3 — Best Budget Build for Accessible Locations

The Heltec v3 (ESP32-S3 + SX1262) is the most widely deployed Meshtastic board in 2026. It is inexpensive (~$20), ships with a built-in OLED display for local status readout, and Meshtastic firmware support is mature and well-tested. Its higher sleep current (~800 µA to 1.5 mA depending on firmware and sleep configuration) makes it less ideal for deep-winter unattended deployments, but for accessible nodes that receive seasonal maintenance it represents excellent value.

Key specs:

  • Sleep current: ~800 µA–1.5 mA
  • TX peak: ~120 mA
  • Average current at 15-min TX interval: ~5–8 mA
  • Built-in OLED: 128×64 pixels
  • Approximate cost: $20–25

Best solar pairing: A 5W panel minimum, a 6000–10000 mAh LiFePO4 pack, and a DFRobot Solar Power Manager (DFR0559) for clean MPPT charging. The Heltec is a strong choice for trail junction nodes that someone hikes to a few times per year to check battery health.

4. Seeed XIAO nRF52840 + SX1262 LoRa — Best Compact Form Factor

For builds where enclosure size is the primary constraint — narrow pole mounts, fence posts, or tight urban installations — the Seeed XIAO nRF52840 paired with the WIO-SX1262 LoRa module delivers WisBlock-class power consumption in a dramatically smaller package. The XIAO form factor is 21mm × 17.5mm, enabling extremely tight custom enclosure designs.

Key specs:

  • Deep sleep current: ~5 µA
  • Platform: Nordic nRF52840 (same MCU as RAK4631)
  • LoRa: SX1262 (SPI connected)
  • Approximate cost: ~$10 XIAO + ~$15 LoRa module = ~$25 total

This is a more involved DIY build requiring soldering and custom case design, but for experienced builders it is the most power-efficient and compact option available at any price point in 2026.

Solar Panel Sizing for Northern Climates

Panel sizing is where most solar node builds go wrong. The near-universal mistake is sizing for summer peak output. Use this planning approach instead:

Sizing formula: Daily energy need (mAh) ÷ worst-month PSH ÷ system efficiency (~0.75) = minimum panel current at STC

Worked example — WisBlock node at 3 mA average current:

  • Daily energy need: 3 mA × 24 h = 72 mAh
  • Required panel output: 72 ÷ 2.0 PSH ÷ 0.75 = 48 mA minimum from panel
  • A 1W / 6V panel delivers ~166 mA at STC — meets minimum, but add 2× safety margin
  • Final recommendation: 2W–3W panel for winter safety margin and snow/soiling losses

Snow accumulation on a flat-mounted panel is a real factor in northern NY. Angling your panel at 60–70° from horizontal sheds snow better and captures low winter sun at a better angle — both arguments for a steeper panel mount in the Adirondacks.

Battery Chemistry: LiFePO4 vs Li-Ion for Outdoor Nodes

Property LiFePO4 Li-Ion / LiPo
Usable temperature range Discharge: -20°C to +60°C
Charge: 0°C to +45°C
Discharge: -20°C to +60°C
Charge: 0°C to +45°C (severe capacity loss below 0°C)
Cycle life 2000–3000+ cycles at 80% DoD 300–500 cycles
Nominal voltage 3.2V per cell 3.6–3.7V per cell
Safety Very thermally stable — no thermal runaway risk Requires protection circuit; thermal runaway possible
Cold-weather capacity Retains ~85% capacity at -10°C Retains ~60–70% capacity at -10°C

For unattended outdoor nodes in northern climates: LiFePO4 is the only responsible choice. Li-Ion capacity drops significantly at -10°C and charging below 0°C causes lithium plating that permanently damages cells. If you’re using a generic solar power bank as your battery — it almost certainly contains Li-Ion cells and will underperform or fail in an Adirondack winter.

Enclosures and Weatherproofing

The enclosure is the most underrated component in a solar node build. Common failure modes observed in field deployments:

  • Condensation inside the box from daily thermal cycling — add a fresh silica gel desiccant packet and replace it annually
  • Water ingress at antenna feedthrough — use proper M16 or M20 nylon cable glands with a rubber seal, not electrical tape around the coax
  • UV degradation of PLA or standard ABS printed cases — use ASA or PETG filament for printed enclosures, or buy commercial ABS/polycarbonate rated for outdoor use
  • Antenna connector corrosion at the board — use self-amalgamating tape over the SMA connector and pigtail exit point

Recommended commercial enclosures:

  • Polycase WC-18 or WC-22 (ABS, IP65-rated, ~$12–18) — good value for most builds
  • Hammond 1554 series (polycarbonate, IP66) — better long-term UV resistance and clarity
  • Generic IP67 ABS junction boxes for budget builds — verify actual IP rating before relying on it

Antenna Selection for Fixed Solar Nodes

For a fixed solar repeater, the antenna choice has an outsized impact on coverage. Key considerations:

  • Frequency: 915 MHz for US/Canada — verify your board’s region lock before deploying. European SX1262 boards are often pre-configured for 868 MHz
  • Fiberglass whip antennas (2–5 dBi) substantially outperform rubber duck antennas for fixed nodes; the investment is worth it for any permanent deployment
  • Coax quality matters: Use RG-316 or LMR-195 for runs under 3 m; LMR-400 for longer exterior runs. Every meter of lossy coax reduces effective range
  • Mounting height: Every doubling of antenna height over flat terrain roughly doubles the radio horizon. A node at 6 m AGL versus 1.5 m AGL can more than double effective mesh coverage in open terrain

If you want a concrete outdoor antenna example for this class of build, the Alfa AOA-915-5ACM from Rokland is a practical fixed-node option for the 915 MHz setups discussed here.

Pre-Deployment Checklist

  1. Bench test 72+ hours with current logging — verify sleep current with a Nordic PPK2, an Otii Arc, or a simple INA219 breakout
  2. Confirm charge controller is operating correctly — measure panel Voc, verify battery voltage at end of a full sun day
  3. Inspect all cable gland seals and tighten securely; verify antenna pigtail connection at board and at antenna base
  4. Add fresh silica gel desiccant packet, seal enclosure
  5. Record: firmware version, channel config, encryption PSK, GPS coordinates of installation point
  6. Log baseline battery voltage at dawn and dusk for the first 7 days
  7. Create a maintenance schedule — every 6 months is recommended for northern Adirondack deployments

Choosing the Right Build for Your Site

There is no single best Meshtastic solar node — the right hardware depends on your site access, maintenance cadence, and network coverage goals:

  • Deep woods / infrequent access / year-round: RAK4631 + LiFePO4 + 3W panel. For a turnkey equivalent with an external 5W panel and rugged IP67 housing, see our Atlavox Beacon assessment.
  • Accessible trail junction / seasonal maintenance acceptable: Heltec v3 + LiFePO4 pack + 5W panel. Or, if you want no-assembly with pre-flashed Meshtastic, the WisMesh Repeater Mini covers the same use case at $99.97.
  • GPS position-reporting relay node: T-Beam Supreme + LiFePO4 18650 + 6W panel
  • Compact pole or fence-post mount: XIAO nRF52840 + SX1262 + 2W panel

If you’re building nodes to expand coverage in the Adirondacks, ADKMesh maintains a growing regional mesh network. Coordinating your deployment with the existing node map prevents coverage overlap and maximizes mesh value for everyone on the network.

Further Reading

FAQ: Meshtastic Solar Node Builds in 2026

What battery chemistry is best for outdoor Meshtastic solar nodes?

LiFePO4 is the strongest choice for year-round outdoor use because it is safer, longer-lasting, and more resilient in cold conditions than typical Li-Ion packs.

How large should a solar panel be for a Meshtastic node in winter?

In northern climates, a practical starting point is usually 2W to 5W depending on average current draw and site shading. Size for worst-month sun, not summer peak output.

What is the most reliable low-power board for unattended deployments?

RAK WisBlock-based builds are commonly preferred for low average draw and long unattended runtime when paired with a correctly sized panel and LiFePO4 battery.

Can I use a standard USB solar power bank as a node battery?

For year-round outdoor use, that is usually a poor choice. Many power banks use Li-Ion cells and control circuits that underperform in sustained cold weather.

Join ADKMesh

Want to run a node or host a relay location in the Adirondacks?

Join ADKMesh / Host a Node

Email to Join | Email to Host a Node

Meshtastic Battery and Solar Sizing for Remote Nodes

Battery and solar sizing is one of the first places new node builders either overspend or underbuild. In Adirondack conditions, sizing mistakes become obvious quickly: winter daylight shrinks, tree cover changes charging behavior, and cold weather reduces battery performance enough to matter.

This guide focuses on practical sizing decisions for remote Meshtastic nodes rather than idealized lab conditions.

Start with the operating goal

A remote node can be built for very different purposes:

  • Short-term seasonal coverage
  • Weekend camp or event support
  • Semi-permanent home or cabin relay
  • Year-round fixed node in difficult weather

The more ambitious the duty cycle, the more conservative your power design should be.

What actually affects sizing

  • Radio duty cycle: how often the node transmits and relays.
  • GPS / screen / extras: convenience features increase draw.
  • Solar exposure: ridgeline, clearing, mixed woods, and cabin roof are not equivalent.
  • Winter conditions: low sun angle, snow cover, and cold batteries all reduce margin.

Battery sizing guidance

Think in terms of days of autonomy, not just one sunny-day recharge. A node that survives only perfect conditions is not really ready for Adirondack deployment.

  • Portable and experimental nodes can tolerate smaller batteries.
  • Camp and cabin nodes should have enough reserve for several cloudy days.
  • Year-round nodes need extra margin for winter and shoulder seasons.

LiFePO4 is usually the easiest chemistry to justify for stability, cycle life, and safer field behavior.

Solar panel sizing guidance

The panel must recover daily use and rebuild reserve after poor charging conditions. If the panel barely keeps up in summer, it will not be enough in November through February.

  • Use real exposure assumptions, not the label on the panel.
  • Tree cover changes the answer dramatically.
  • Mounting angle and snow management matter in winter.

Common mistakes

  • Choosing the smallest panel that “works on paper”.
  • Ignoring winter daylight.
  • Adding GPS, displays, and sensors without recalculating budget.
  • Deploying with no logging or check-in plan.

A conservative build mindset

If the node is remote, inaccessible, or mission-critical, bias toward reserve capacity and simplicity. Reliability matters more than shaving a few dollars off the battery or panel.

Before you deploy

  • Confirm all-day and all-season sun assumptions.
  • Test the node locally for at least several full charge/discharge cycles.
  • Weatherproof cable paths, connectors, and enclosure penetrations.
  • Only deploy on land you own or where you have explicit permission.
  • Follow leave-no-trace principles and remove failed gear promptly.

Disclosure: Some gear links on ADKMesh may be affiliate links. If you buy through them, ADKMesh may earn a commission at no extra cost to you.

If you are sourcing battery, panel, connector, and mounting parts from one US vendor, Rokland is the priority vendor to check for Meshtastic-compatible hardware and accessories.

Pair this guide with our Best Meshtastic Solar Node Builds in 2026 post and the Meshtastic Winter Readiness guide. If you would rather skip the sizing math and buy something turnkey, our assessments of the Atlavox Beacon (anchor node) and the WisMesh Repeater Mini (coverage-gap filler) cover both ends of the commercial-product range. Official project docs are available from Meshtastic.